I like to make my thumbnails in a 4:3 aspect ratio, while Starlight Arcade’s aspect ratio is a 3:2. So I figured out a way to crop the screenshots I take in Starlight Arcade to a fixed 4:3 ratio. The problem is that I constantly forget all the steps and have to research them again and again from multiple sources. So here’s how to do it, all on one page. This post is as much for me as it is for any interested parties out there.
1. Take an image of your choice and open it in Gimp. I am going to use the below screenshot from Starlight Arcade:

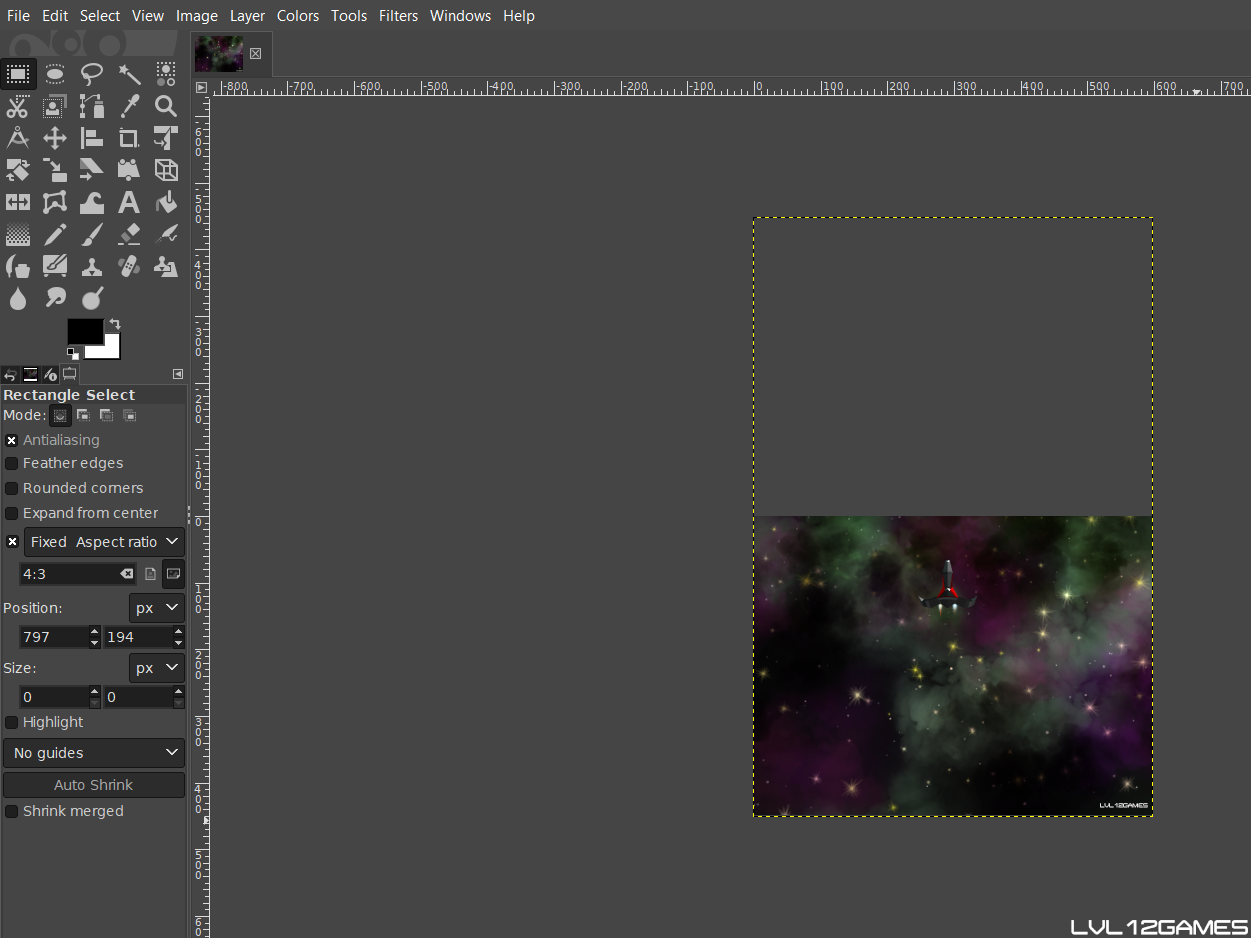
2. With the image in Gimp, select the “Rectangular Select” tool and click the “Fixed Aspect Ratio” box in the options that appear. Change your aspect ratio in the text box below the check box (I am using 4:3) and then draw your selection on the image. The selection rectangle should be locked to the desired dimensions.
3. With the image you want inside the selection box, click “Image” in the top ribbon, and then “Fit Canvas To Selection”. This will delete anything outside of the selection and shrink the canvas to match.
4. You should now be able to export the image in the new aspect ratio. Like so:

Another tip I learned in this process was how to invert your selection. For example, if you have selected an object and want to delete everything else around it. To do so, hit CTRL+I or click “Select” in the top ribbon and “Invert”. That will invert your selection. Hitting Delete will delete what is inside the inverted selection. Note that it will not shrink the canvas, though.
– LVL12GAMES